And I will bury my soul in a scrapbook, with the photographs there and the moths.
~Leonard Cohen

Merry Christmas**Creative Inspirations**

Alright, time to share another project in which I used my Creative Inspirations Shimmer Paints.

I have been needing to make a few christmas cards, therefore I did just that. =)
For this card, I used the Bo Bunny "Noel" collection along with some of the new gorgeous Petaloo flowers!! They're are soooo pretty! As you can see, I kept the card pretty simple.

Now here's the paint, the wowness of this...Look at that sparkle! Just love this stuff!

Ok, that's all for now..=) Need to get some stuff done around the house.
Can't believe its almost christmas!! CRAZINESS!

Dec. 15th Sketch Reveal**Stuck?! Sketches**

Ok so it's time to reveal the sketch for December 15th from Stuck?! sketches.
Here it is:


Here is my take on it, surprisingly enough, I refrained from piling on the embellies lol...being it was a more simple sketch.


To check out the other gals and what they did with this sketch, click HERE.

My Dream**IOD**

Ok it's 10:50 pm, I should be tucked away in bed but I'm not because I napped this afternoon and now I have to suffer the consequences for that ation..Grr!
I said I would be back to share something else with you.

Here's a design team layout I made for IOD, using the "Loolah" collection.

I made my own flowers, sprinkling them with Diamond Dust. =) I used some of the Loolah rhinestone brads as the centers for the 2 smaller flowers.


Here's are a couple of closeups on the cardstock stickers.
*For my title, I used one of the alpha sticker sheets, which if you look closely, you're really suppose to peel off just the letters and use them for your title, but I LOVED the small print that completed the title so I just cut out the whole square from the sheet, making it my title.=)

Products used: Paper: Loolah Collection (25559),(25576),(25558),(25560),(25555); Pearls & Brads (26501),(26500); Cardstock stickers (26503),(25567),(25568),(26504); Die Cut Journaling Pad(26505)

Ok ladies That is all! Now off to bed and hopefully fall asleep soon!
Goodnight!
Thanks for visiting!

Smile**Webster's Pages**

This month has been so crazy with the holiday nearing, luckily I am sooooo done with all my christmas shopping, THAT feels good.=) Can't wait for Christmas Day, my kids are going to be thrilled with what they got, especially Nicole! You all will be sure to see a layout of one of her gifts, things' humongous!

Today I would like to share a layout I made using the Webster's Pages "Hollywood Vogue" collection, one of my faves from them. Love the greys and blues.


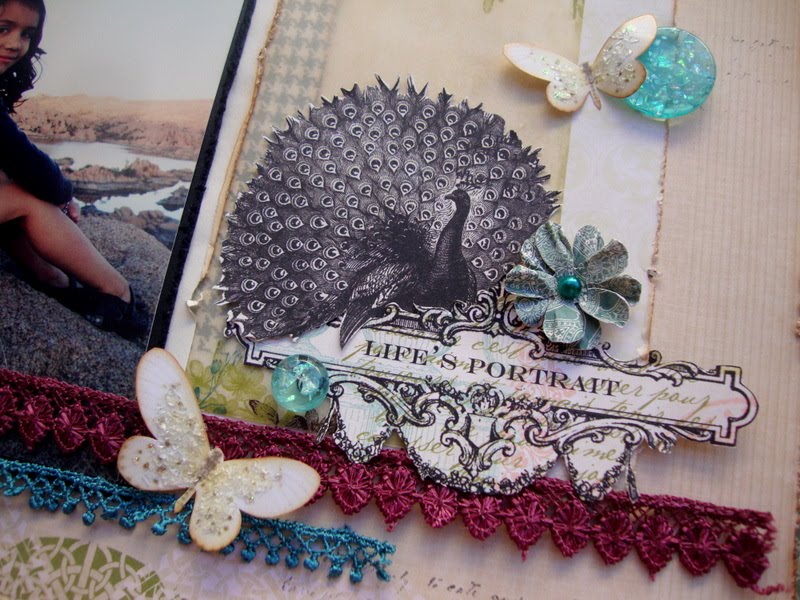
I cut apart a few of the bloomers to pair with my handmade flower, which I made with some of the papers in the collection, check out the gorgeous sparkler center!

If I had to name right off the top of my head one of my fave things from WP, it would have to be their trims, they are always so beautiful. Here's a closeup of the vintage lace. Gorgeous, right?! As for the peacock, I cut it out from another WP paper, along with the life's portrait frame.


Products used: Hollywood Vogue Collection: papers (US1767D), (US1769D), (US1764D); Hollywood Vogue 6x6 papers (WS1038); Journaling cards (US162); Life's Portrait Collection: papers (US1746D), (US1750D); Trim: (TM7024), (TM7054); Bloomers: grey & peacock; Sparklers: Glitter (WGS07), Scalloped (WSS14); Alphas: Hollywood(WS1038).

I hope you all enjoyed this layout as much I did making it.

If you like what you see, you can get all these goodies from a little shop called Stay True to God, some of you may know Tracy, she is the one of the most sweetest, giving people I have met.
Thank you Tracy for everything! be sure to stop by her shop!

Tomorrow I will have something else to share=)
Til then....((HUGS))

Pinwheel Tutorial+Layout

I got alot of questions on a tutorial for pinwheels on the last layout used this paper embellishment on...so here is a quick tutorial on how to make them!

What you will need:
-scissors
-patterned paper(preferrably double sided)
-glue dots
-center such a brad, pearl, button, etc.

STEP 1...Cut 2 SAME SIZE squares. I chose mine to be 3x3. Cut each corner almost to the center. Be careful to not cut all the way to the center or else ur square will fall apart.


This is what it should look like.


STEP 2 ...Place a glue dot in the center. Take one corner at a time and bring it to the center, as shown below. Do this to all 4 corners.

This is what it should look like once you have taken in all 4 corners.

Here are both pinwheels done.

Step 3...Take either(which will be the one that goes on top when u layer them) and add your center. For mine, I added a pearl brad. =)


STEP 4...Take both your pinwheels, the one with the center being the top one, and layer them. I adhered mine together with hot glue, any fast drying heavy duty glue will due. Here is your finished pinwheel! Ready to add to any of your projects.

Here is a layout I made, using pinwheels. All papers are from My Minds Eye. These "Little Boy Blue" papers were perfect for this summer picture of my son, eating his first ever snow cone, he loved it to say the least.


The MME ticket stickers were perfect for short journaling. They are so cute!

I hope you have enjoyed this quick and easy tutorial, as well as the layout. Hope you all have a great night.

LinkWithin

Related Posts with Thumbnails